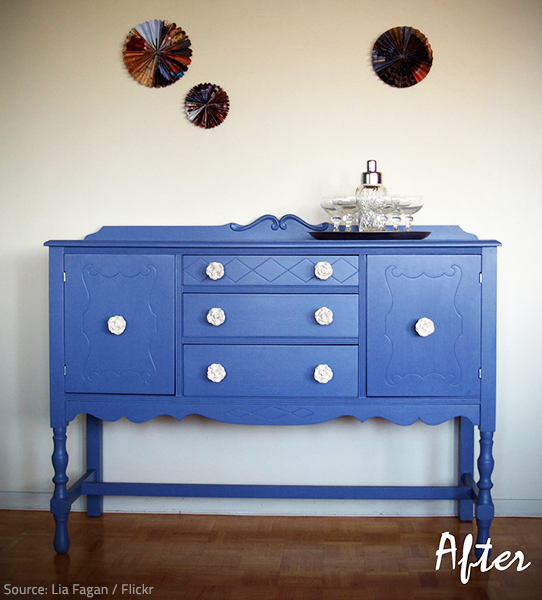
Painted furniture provides you with an easy way to create an artistic statement in your home.
Painted furniture creates an artistic color accent in a room, brightening up the space and adding unparalleled charm to the home décor. However beautiful and stylish they may be, though, painted pieces aren’t immune to wear and tear – as time passes by, the lustrous colors begin to fade and the paint starts to flake and peel, making your cherished furniture look old and shabby.
At this point, you may begin to consider replacing the scruffy-looking pieces in order to revitalize your living space and enhance your home’s appeal. This, however, is not your only option – especially when it comes to high quality, solid wood furniture. Instead of spending a fortune on new pieces that may not match your interior décor, aesthetic taste, and practical needs as well as your old ones, you can simply repaint your furniture. This is a cheap and easy way to transform a shabby piece into a work of art that will not only look amazing, but will also perfectly fit your surroundings and your personal style.
To achieve the desired results, you need to know how to fix peeling paint on furniture the right way. Here are a few essential things to keep in mind when undertaking your furniture repainting project:
Prepare the Furniture Properly
It is common for painted furniture to start peeling after many years of daily use, but this may happen much sooner if the surface hasn’t been well prepared for painting.
So, if you wish to properly fix your peeling furniture, you need to properly prepare it first:
1) Wash the furniture with soapy water to remove any dust and dirt from the wood surface – otherwise, the primer and paint won’t adhere properly, so the new paint will peel or chip away instead of sticking to the piece. Rinse with clear water and let the piece dry completely;
2) Remove drawers and shelves (if applicable) and take off hardware parts that don’t need to be painted (hinges, door knobs, drawer pulls, etc.);
3) Strip the old paint. You can use a paint scraper to remove the flaking paint, but an appropriate chemical stripper or a heat gun will help you complete the task in a quicker and easier manner. It won’t be a problem if you cannot strip all of the paint, but you need to pay particular attention to the edges between painted areas and bare wood. Painting will accentuate any ridges and edges, so you need to smooth them very well when sanding the piece (see below);
4) Fix any cracks or dents with wood filler to produce an even surface. Even though small dings and cracks may be hard to see, they will show up very well when the piece is painted, so you need to take proper care of them before repainting the furniture. It is a good idea to look over the piece with a light shining at different angles (you may want to use a flashlight) in order to find any cracks or holes that need to be filled;

The better prepared your furniture is, the more impressive the final results will be.
5) Sand the entire piece with 120-150 grit sandpaper to remove any remaining paint and even out the surfaces. Then, smooth the whole piece down with fine (220 grit) sandpaper. (Make sure you sand along with the grain of the wood and be careful not to damage the furniture by sanding too deeply). The surface has to be absolutely smooth, so that the primer and the paint can adhere well to it;
6) Wipe all the surfaces with a tack cloth to clean off any dust from the sanding;
7) Cover any parts of the furniture you want to avoid getting paint on (glass elements, non-detachable hardware, etc.) with quality painter’s tape.
Now your furniture piece is ready to be painted, but you need to do a few more things before you can get down to work:
- Prepare the work area. Put a large drop cloth or tarp on the ground to catch paint chips and wood dust and cover any nearby items with old sheets or other appropriate protective coverings to prevent stains and make it easier to clean the area after the job is completed. Open windows and use fans to ensure good air circulation in the room;
- Ensure your personal safety. Always wear rubber gloves, safety glasses, and a dust mask when scraping or sanding painted wood to prevent injuries and protect yourself from noxious fumes, lead dust, flying debris, chemical burns, and other risks. Keep in mind that stains and stripping chemicals can ignite, so you should never work near an open flame.
Good to know: If your furniture has a glossy or polyurethane finish or a waxy topcoat, most types of paint won’t be able to stick. If this is the reason why your furniture is peeling, you will need to remove the top layer or, at least, sand it to rough up the surface when preparing the piece for repainting, so that the new paint can adhere well. If you cannot (or don’t want to) remove the original finish, you need to apply an appropriate primer that will allow the new paint to stick or use a paint that is especially designed to adhere to polished surfaces.
Repaint the Furniture
When repainting wood furniture, you’re advised to:
1) Use a good primer
Prime the surfaces to prevent the wood from absorbing the stain unevenly or showing differences (wood filler will take the paint differently from the rest of the piece, there will be variations of the color over bare wood and stained wood, etc.). The paint will adhere more uniformly and will last longer when applied over a coat of appropriate primer (without it, the paint may start peeling very quickly).

Repainting old furniture is both enjoyable and rewarding.
In addition to providing a good base for the paint, quality primers also help prevent mold growth and block tannins from the wood from seeping up.
Good to remember: The type of primer you use should be suitable to the type of wood of your furniture, the type of finish it has (especially important for high-gloss finishes), and the type of furniture paint you intend to use – if you use an inappropriate primer, the paint will start peeling off very soon.
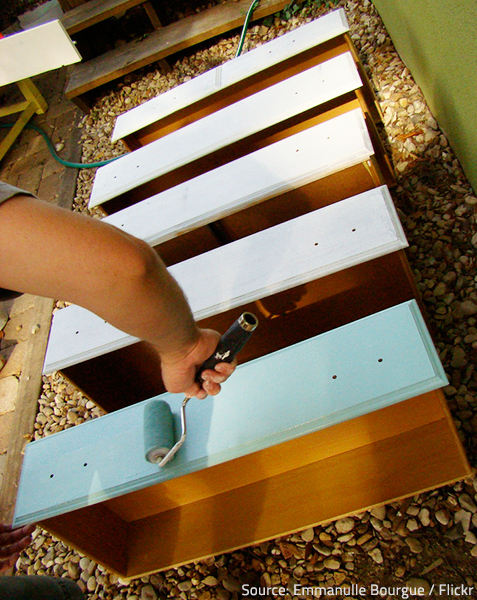
Apply the primer with a foam roller (for large, flat surfaces) or a quality paintbrush (for corners, edges, and harder-to-reach areas). Once the primer has dried, lightly sand the piece with fine-grit sandpaper and wipe the surfaces clean with a tack cloth.
2) Stain the furniture
Make sure you choose the right paint for your furniture (not just any paint with the color you like):
- Select paint that is especially designed for slick surfaces if your furniture has laminate or lacquer;
- Opt for latex-enamel paint that is stronger than standard latex house paint and adheres better to wood surfaces;
- Use exterior-grade paints for outdoor furniture.
Do not forget to test the paint on a small, inconspicuous area of your furniture before applying it all over the piece.
Keep in mind that even with the best preparation and the most appropriate products, a poor painting technique may easily result in cracking and premature peeling.
- Apply a thin, even coat of stain (the thicker the paint is applied, the longer it will take to dry and the more likely it will be to peel) over the furniture – use a foam roller or a staining pad for larger surfaces and a quality paintbrush for edges and corners. If possible, apply the paint with a sprayer;
- Wipe off any excess paint with a clean cloth and let the piece dry for the recommended period of time;
- Lightly sand the piece to remove any drips or residue from the paint and smooth the surfaces;
- Wipe with a new tack cloth to get rid of any dust or debris before applying the next coat of paint;
- Repeat the process (you will need to apply multiple thin layers) until the desired color is achieved. The more coats you apply, the darker the finish will become.
Set your repainted furniture aside for three to five days, so that every layer of paint can dry completely and solidly adhere to the furniture.
3) Protect the paint
As all types of finishes, paint needs to be sealed in order to last longer and better withstand wear and tear. A few coats of sealant will create a hard outer layer that will prevent cracking and peeling of the paint.
Wait until the final coat of paint is fully dry, wipe the furniture surfaces perfectly clean, and apply a thin layer of clear polyurethane sealer to provide the best possible protection to the paint. Once the first coat is dry, lightly sand the piece with fine-grit sandpaper to make the surface smoother. Use a new tack cloth to remove any dust from the sanding and apply the final layer.

Looking like new again and matching the color scheme of your home – just perfect!
Allow the wood to cure for a couple of days before putting your repainted furniture back to use.
Good to know:
- It’s best to paint furniture when the weather conditions are favorable (mild temperatures and low humidity), so that the paint won’t dry too fast and crack or take too long to dry and get damaged in the process;
- Keep your repainted furniture in a room with low humidity or use a dehumidifier to reduce the amount of moisture in the air, as high humidity causes the paint to begin to flake;
- If the peeling is minor, you may fix the problem by patching the paint instead of applying a new coat over the entire piece. Sand away the flaking paint, apply a suitable primer to the exposed areas, and paint the damaged parts (make sure you match the color perfectly);
- If you don’t want to repaint your peeling furniture, you can simply sand away the flaking paint and apply a clear sealant on top – this will result in a weathered look that is considered very stylish nowadays.
Now that you know how to fix chipping paint on furniture, you may decide that the project is too difficult or too time-consuming for you to complete. In this case (or if you need expensive antique furniture or highly-treasured family heirlooms repainted), do not hesitate to leave the job to experienced furniture refinishers. The specialist will take proper care of your valuable pieces and will save you plenty of time and effort. The best part is that your shabby old furniture will look as good as new and will be the exact color you want it to be (and just for a fraction of the cost for buying a new piece of similar quality).


