When furnishing your home you have most certainly chosen elegant and comfortable pieces that suit your lifestyle and your aesthetic preferences. However, after years of wear and tear, time has probably left its mark on the delicate surfaces and your furniture has started looking old and tired. So, if you want to continue using your cherished furniture pieces, you need to find a way to restore their original good looks and sturdy feel. You have several options when it comes to breathing new life into your worn-out pieces but repainting furniture is your easiest and most efficient solution. The process is simple and requires just a few basic tools and little effort on your part. What’s more, you will be able to adapt the furniture to any color scheme you want to and transform it into a beautiful work of art that perfectly fits your surroundings, style, and purpose.

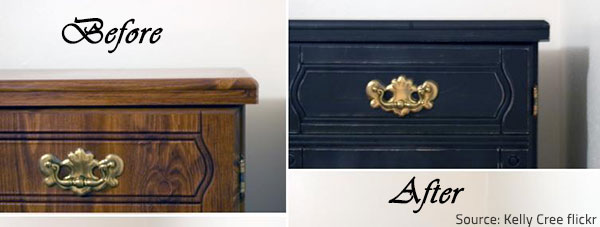
Repainting furniture is the easiest and most efficient way to breathe new life into your old pieces.
Supplies for Painting Furniture
Before you can begin your DIY painting project, you need to gather the necessary supplies, of course. So, what do you need to paint furniture?
- Screwdrivers and other basic tools to remove hardware parts;
- A heat gun or an adequate paint-stripping product to remove layers of old paint from your furniture pieces;
- Fine grit sandpaper to lightly rough up the surfaces so that the primer and/or the paint can easily adhere to your furniture;
- Quality wood filler (to fix cracks, dings, or scratches) and a small spatula to apply it;
- Primer to provide an appropriate base for the paint;
- Latex paint in the finish you want for your furniture;
- High-quality foam rollers and paint brush to apply the primer, the paint, and the topcoat;
- Finishing wax or polyurethane sealer to protect your painted furniture;
- Painter’s tape to protect certain parts of the piece you are painting;
- Drop cloth, tarp, or old blankets to protect the floors, carpets, and other surfaces in your home;
- A tack cloth to clean dust and debris from the surfaces;
- Oil soap or another appropriate cleaner to wash your furniture clean;
- A face mask, gloves, and other personal protection gear to ensure your safety.
How to Prepare Furniture for Painting
There are several important steps to take in order to properly prepare your furniture for painting:

Take the right steps to ensure the excellent results of your furniture repainting project.
1) Wash your furniture piece well and let it dry completely;
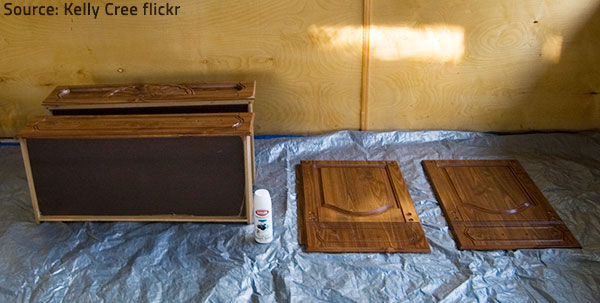
2) Prepare your work area. If you are going to paint your furniture inside, put some old sheets or blankets, or a piece of tarp on the floor, place the furniture piece that is to be painted in the middle, and open all the windows to ensure good air circulation;
3) Put on a face mask, gloves, safety glasses, etc. to prevent injuries and protect yourself from noxious fumes, flying debris, chemical burns, and other risks;
4) Remove drawers (if any) and take off hinges, door knobs, drawer pulls, etc. This way you will be able to keep the hardware paint-free and the entire furniture piece will be adequately and evenly covered with paint. It is a good idea to place every small detached piece in a separate plastic bag with an appropriate label, designating the exact location where the item came from, so that you can put it back in the right place. Cover any hardware parts that cannot be removed, as well as any parts of the furniture piece you want to avoid getting paint on, with quality painter’s tape;
5) Strip existing layers of paint to make sure the furniture surfaces are smooth and even, your fresh paint won’t peel off easily, and the doors and drawers will close properly. However, be careful when using a paint-remover, as paint-stripping products usually contain harsh and harmful chemicals. If possible, use a heat gun instead of liquid strippers – you will be able to complete the task in a much more efficient, quicker and safer manner;

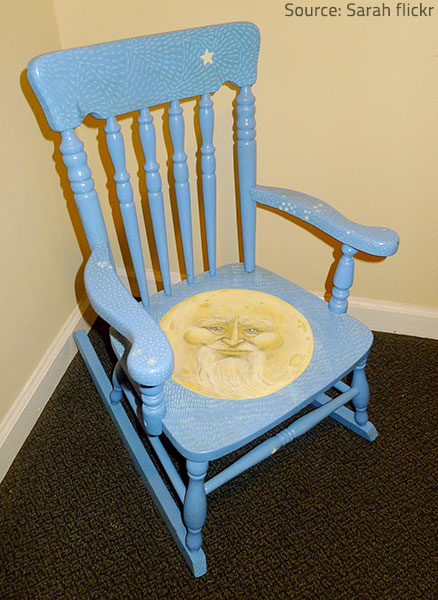
You’ll be able to put your creativity to good use when repainting old furniture pieces.
6) Fix any cracks, scratches, holes, or dings with wood filler. Apply the product to the damaged part of the wood with the help of a small spatula, scrape away any excess, and let the filler dry completely. Then, sand the repaired area smooth;
7) Give all the surfaces of your furniture piece a light sanding (it is generally recommended to use 150-grit sandpaper) to rough up the finish, so that the primer and the paint can better adhere to the piece;
8) Wipe the surfaces gently with a tack cloth (never use a paper towel instead!) to remove any dust and/or residue left after sanding the piece.
Having completed all of the above preparation steps, you are ready to start painting your furniture.
In case you want some precious antique furniture or highly-treasured family heirlooms repainted, however, you are strongly advised to hire experienced furniture refinishers to take proper care of your valuable pieces. Otherwise you risk damaging them in the process.
How to Paint Furniture
Provided that you follow our useful tips for painting wood furniture and work with care, you should be able to easily achieve quite satisfactory results. Here is what you need to do when painting old furniture:
- Prime the surfaces to ensure an even look and a beautiful finish on your repainted furniture. The paint will adhere evenly to the wood and will last longer when applied over a coat of primer. Besides, quality primers not only form a good base for the paint, but also help prevent mold growth and block tannins from the wood from seeping up. Have in mind that the type of primer you have chosen should be suitable for the type of furniture paint you intend to use. Work with a small foam roller to apply an even coat of the primer over large flat surfaces and use a paintbrush along corners, edges, and harder-to-reach areas. Let the primer dry completely, sand away with 220-grit sandpaper, and wipe the surfaces clean with a tack cloth. Repeat, if necessary;
- Apply a thin coat of semi-gloss latex paint on the even surfaces with the help of a foam roller and use a quality paintbrush to paint edges and corners. Wait for six to twelve hours for the paint to dry completely (depending on the climatic conditions and the ambient temperature) and sand the surfaces lightly to remove any drips or residue. Wipe with a new tack cloth to get rid of any dust or debris before applying the next coat of paint. Repeat the process three times to get a smooth, professional-looking finish on your furniture;
- Finally, apply a thin coat of water-based polyurethane sealer to provide adequate protection to your repainted furniture piece. (Remember that it is very important to remove every speck of lint and dust before applying the protective finish.) Once the first coat is dry, sand lightly, use a new tack cloth to wipe the surfaces perfectly clean, and then apply the final second coat;
- Set your furniture aside for three to five days to cure, so that every layer of paint can dry completely and solidly adhere to the furniture. Then, reattach the removed hardware parts in their rightful spots and enjoy the wonderful new look of your old furniture! Your repainted piece is ready to use!

Your newly-painted furniture pieces will perfectly fit your surroundings, your needs and your aesthetic preferences.
One final piece of advice: If possible, paint furniture when the weather conditions are optimal (mild temperatures and low humidity) to make sure the paint won’t dry too fast and crack or take too long to dry and allow dust, hair, or small insects to mar your finish.
The above-described techniques for painting furniture will help you give new life to your old furniture. If you are not up to the challenge, however, consider using professional wood-refinishing services. The astonishing results from their work will surpass your highest expectations and your old furniture pieces will remain in excellent condition for many years to come.


